
Lots of Media Only on DVD
There’s a lot of great media only available on DVD and most of it can be found for next to nothing at thrift stores, yard sales, and antique malls. Even brand new DVDs are pretty cheap!
TL-DR: Modern Blu-Ray players do a pretty good job of upscaling DVDs and if you want to watch one without fuss, just pop in the disc and push “play.”
RetroTINK 5x settings for DVDs
How to pick the right DVDs and get the most out of them with the RetroTINK 5x!
But, sometimes you want more control over the video upscaling and that’s where the RetroTINK 4K comes in. These profile settings will work with the RetroTINK 4K and partially with the CE model.
Motion Adaptive de-interlacing or the Film Mode features for Inverse Telecine. If you are trying to decide which model to get and you plan to upscale interlaced content (like VHS, LaserDisc, DVDs, and PlayStation 2 games) you will want to go with the RetroTINK 4k and not the CE model.
Set Up Your DVD Player
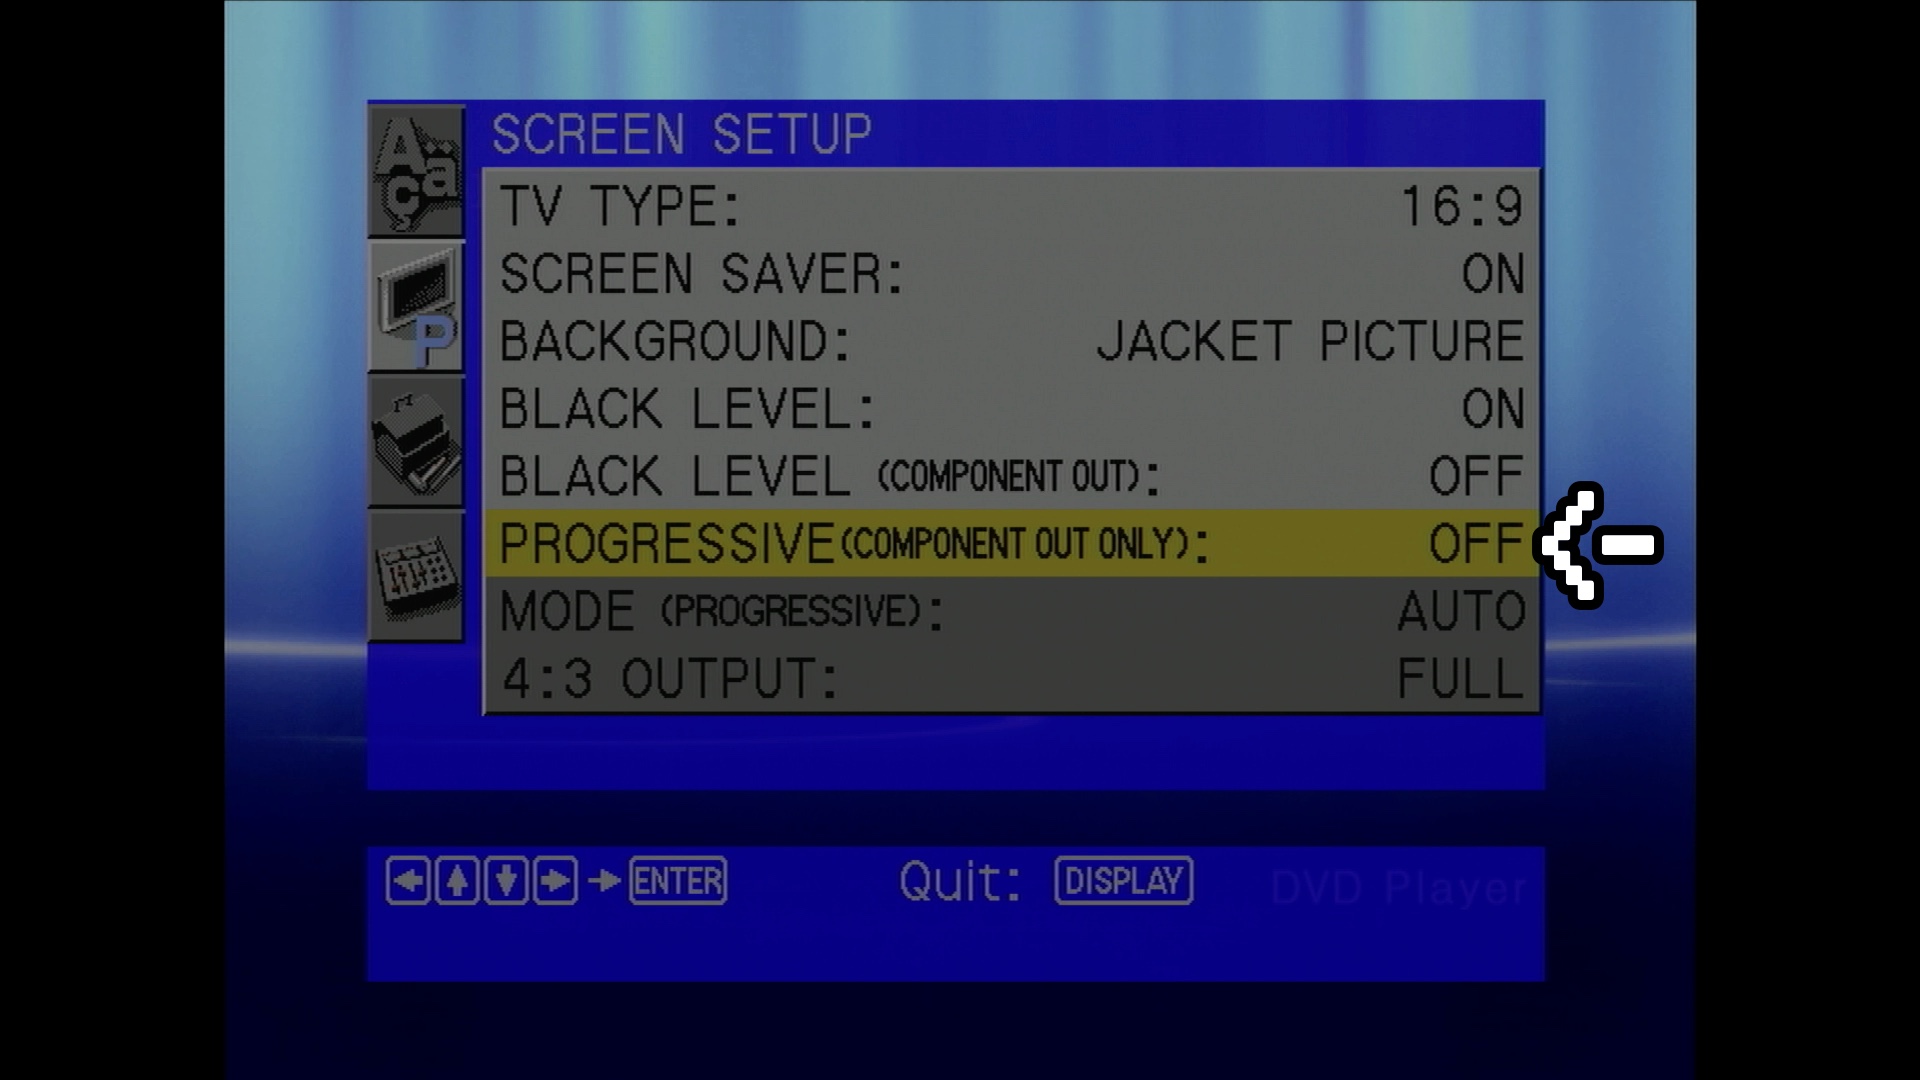
First, you want to set up your DVD player. DVDs are a 480i medium and a lot of modern players will deinterlace that into a 480p, or “Progressive” signal. If your player does this, be sure to turn this off. The RetroTINK does a way better job of deinterlacing.
Here’s the basic setup:
- Connect the DVD player to the RetroTINK 4K with the best quality connection available. Component is preferred, but S-Video isn’t too bad either. (HDMI is fine as long as you can send a 480i signal through it.)
- Go into the DVD player’s settings and turn off
Progressiveor set the output tointerlacedor480i. (Only for a component or HDMI connections.) - Start playing a DVD
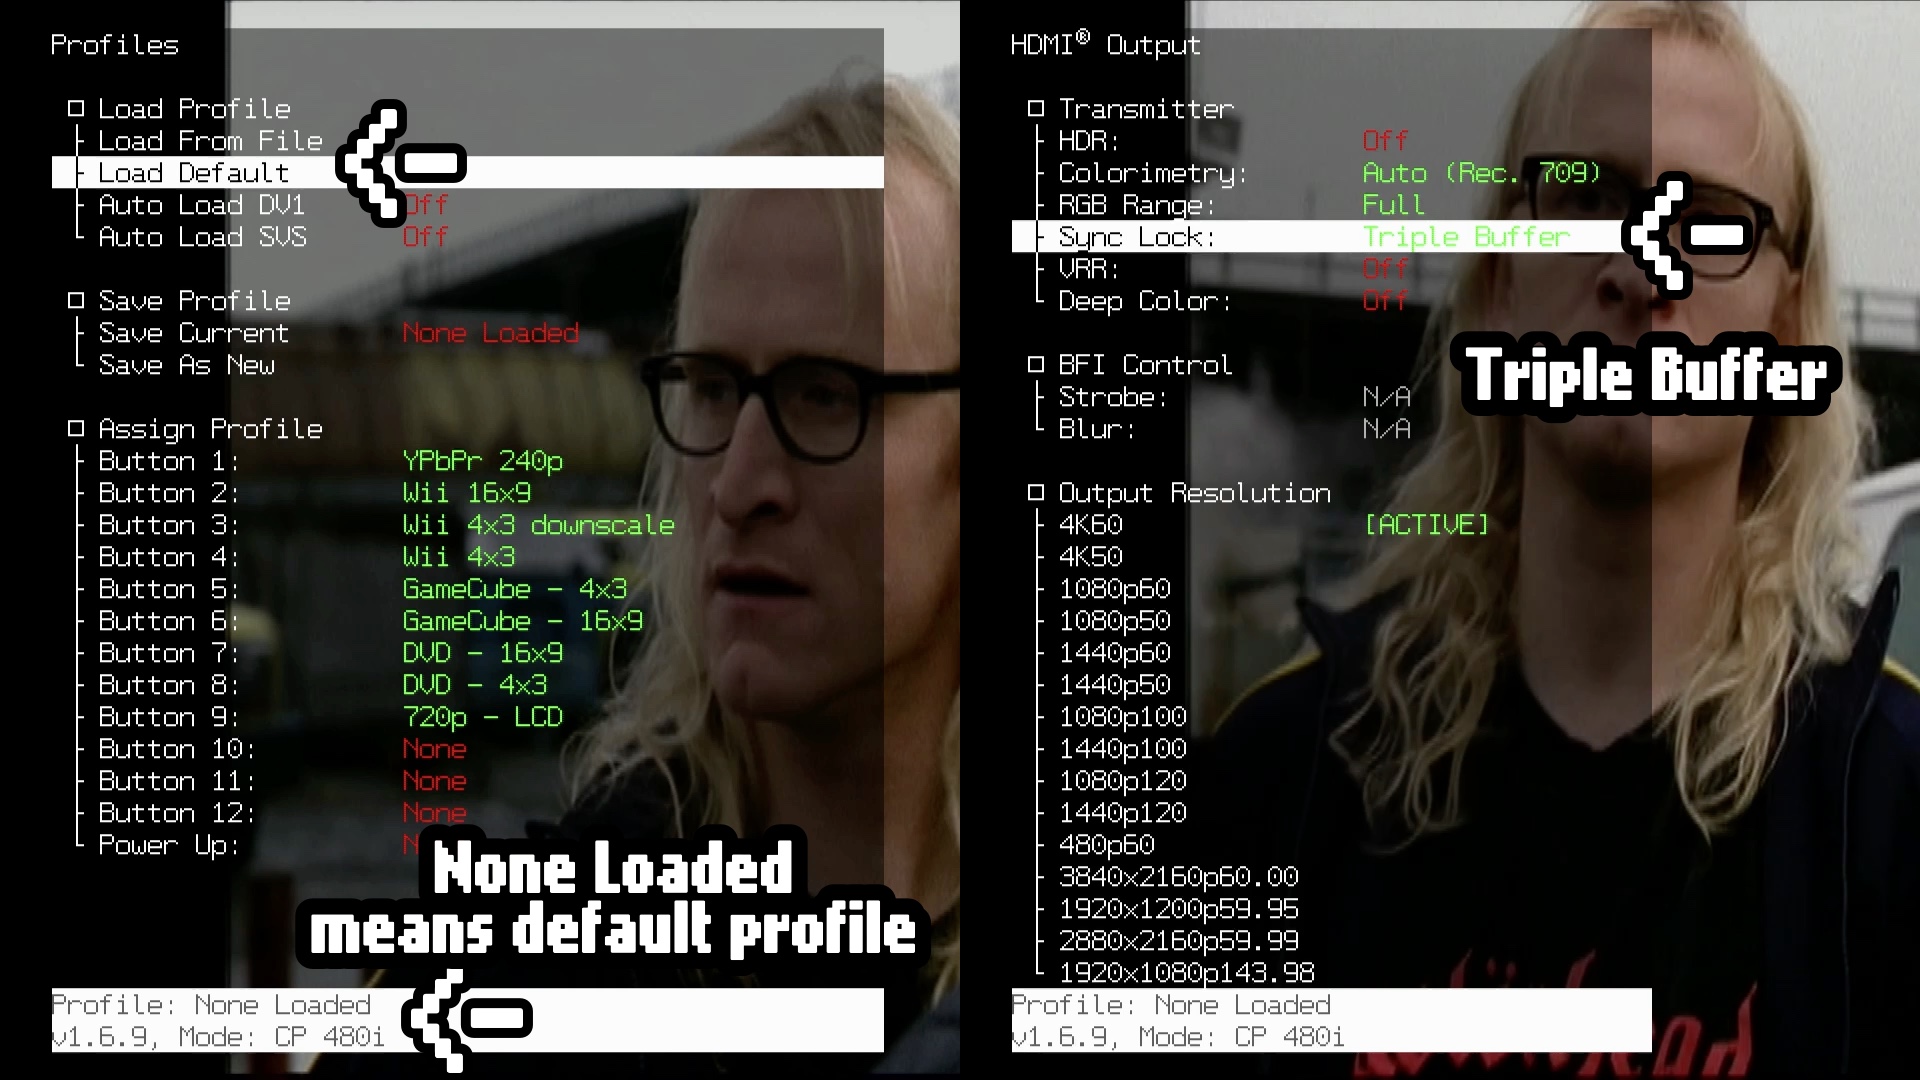
You’ll know that you are in 480i mode by looking at the bottom of the RetroTINK 4K menu. It’ll say “Mode: CP 480i.”
You can also push the STAT button on the RetroTINK 4K remote control. If Detected Mode says 480i, you are good to go!
RetroTINK 4K Profile Settings
- First, enable the default profile if it isn’t already. It’s in the
Profilesmenu. - Then go to the
HDMI Outputmenu and make sure theSync Lockis set toGen Lock. This is important for Film Mode to work. - Then set
HDRtoOff.
The next setup is all in the Advanced Settings menu.
- Go to
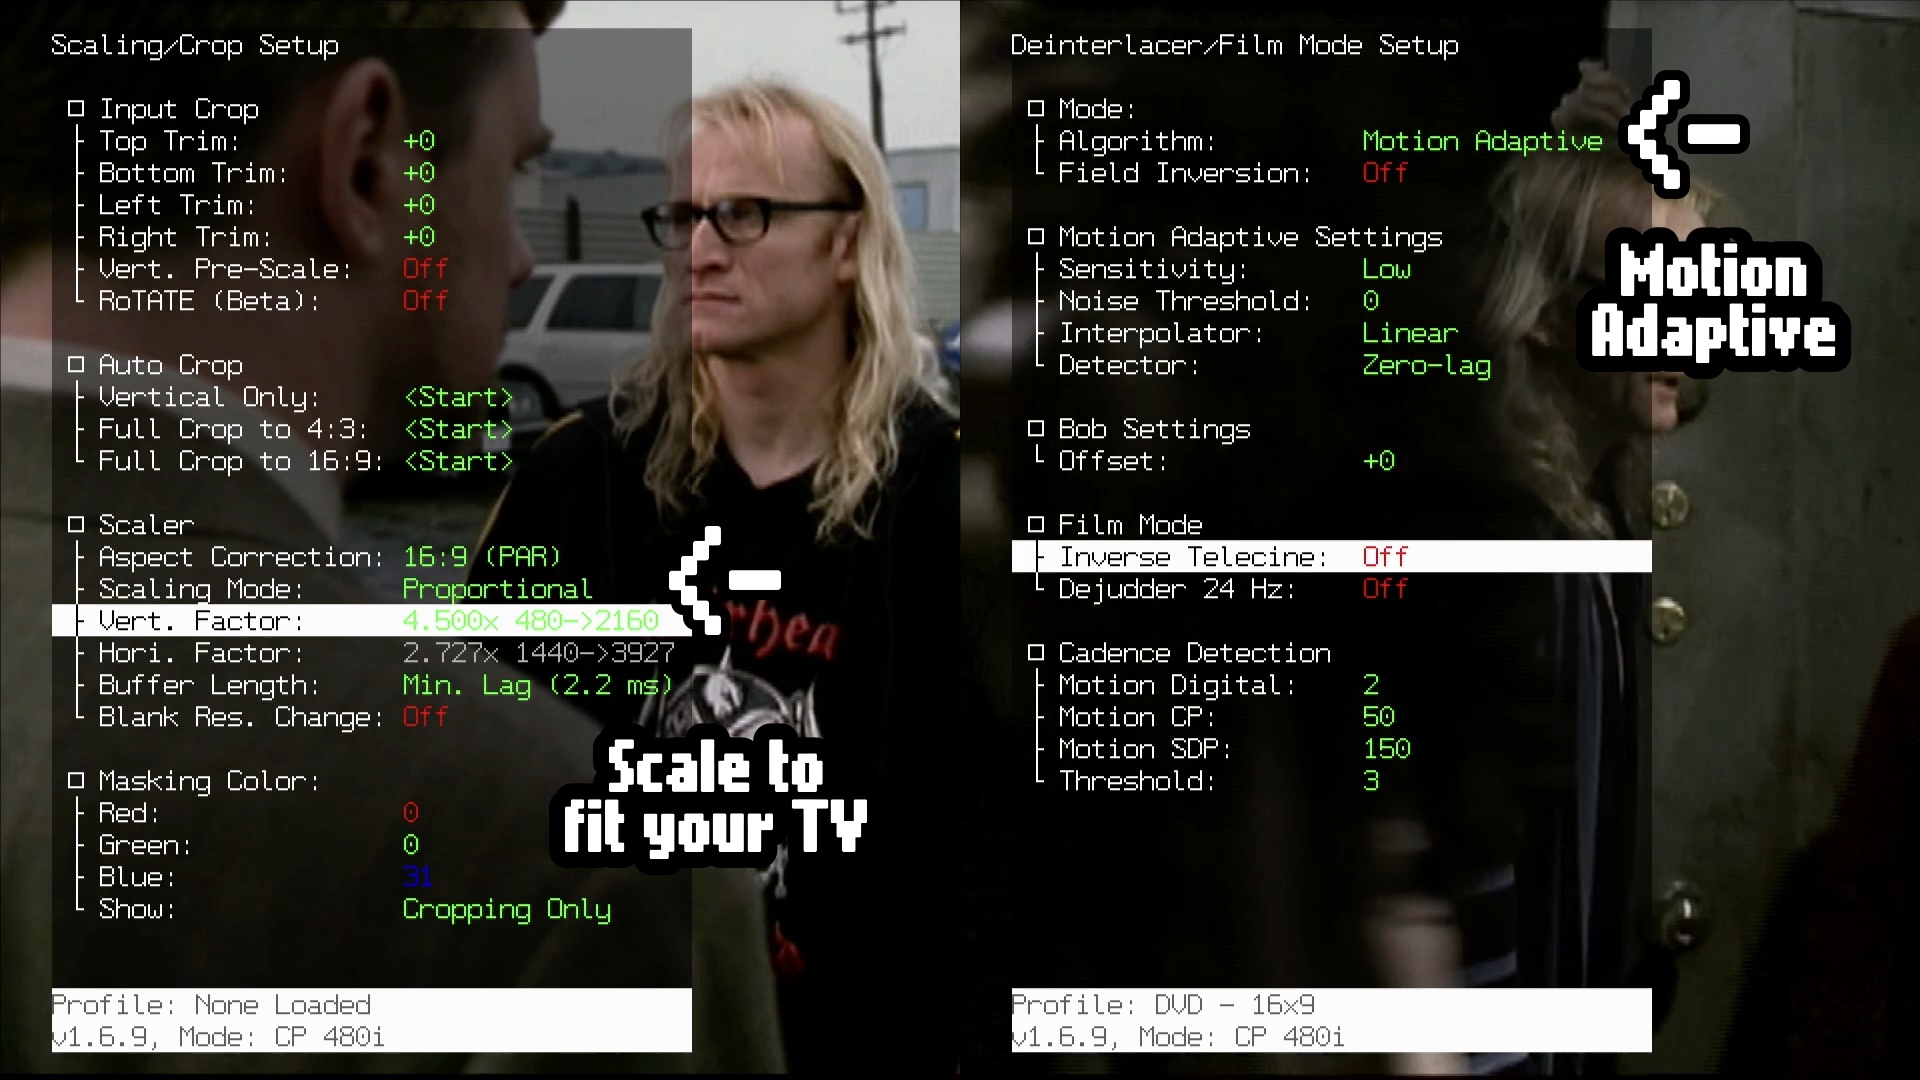
Scaling/Crop Setup. Change theAspect Correctionto16:9if you are watching widescreen video. Use4:3for anything else. - Then go to
Scaling Mode. SelectProportionaland change theVert. Factoruntil the picture is sized to fit your screen. You can try theAuto Cropoption. - Next up is
Deinterlacer/Film Mode Setup. UnderAlgorithm, chooseMotion Adaptive. - Film Mode
- For Hollywood movies or TV shows shot at 24fps you want to set
Inverse Telecineto3.2. - Turn
Dejudder 24 HztoOn. Dejudder 24 Hz requires Sync Lock set to Gen Lock. It doesn’t work in Triple Buffer mode. - For other DVDs that have 30fps content, you can set
Inverse TelecinetoOff. - It doesn’t hurt to leave
Inverse Telecineto3.2all the time. If the video stutters or won’t sync, just turn this feature off.
- For Hollywood movies or TV shows shot at 24fps you want to set
- Now go to
Processing/Effects Setup - Set
Interpolationfor bothVert. KernelandHori. KerneltoBilinear Std.. - Then go down to
Maskand setenabletoMultiply. - Change
Strengthto about-6. - Select
Load from Fileand browse theRGB Masksfolder to findSlot Mask Medium RGB.
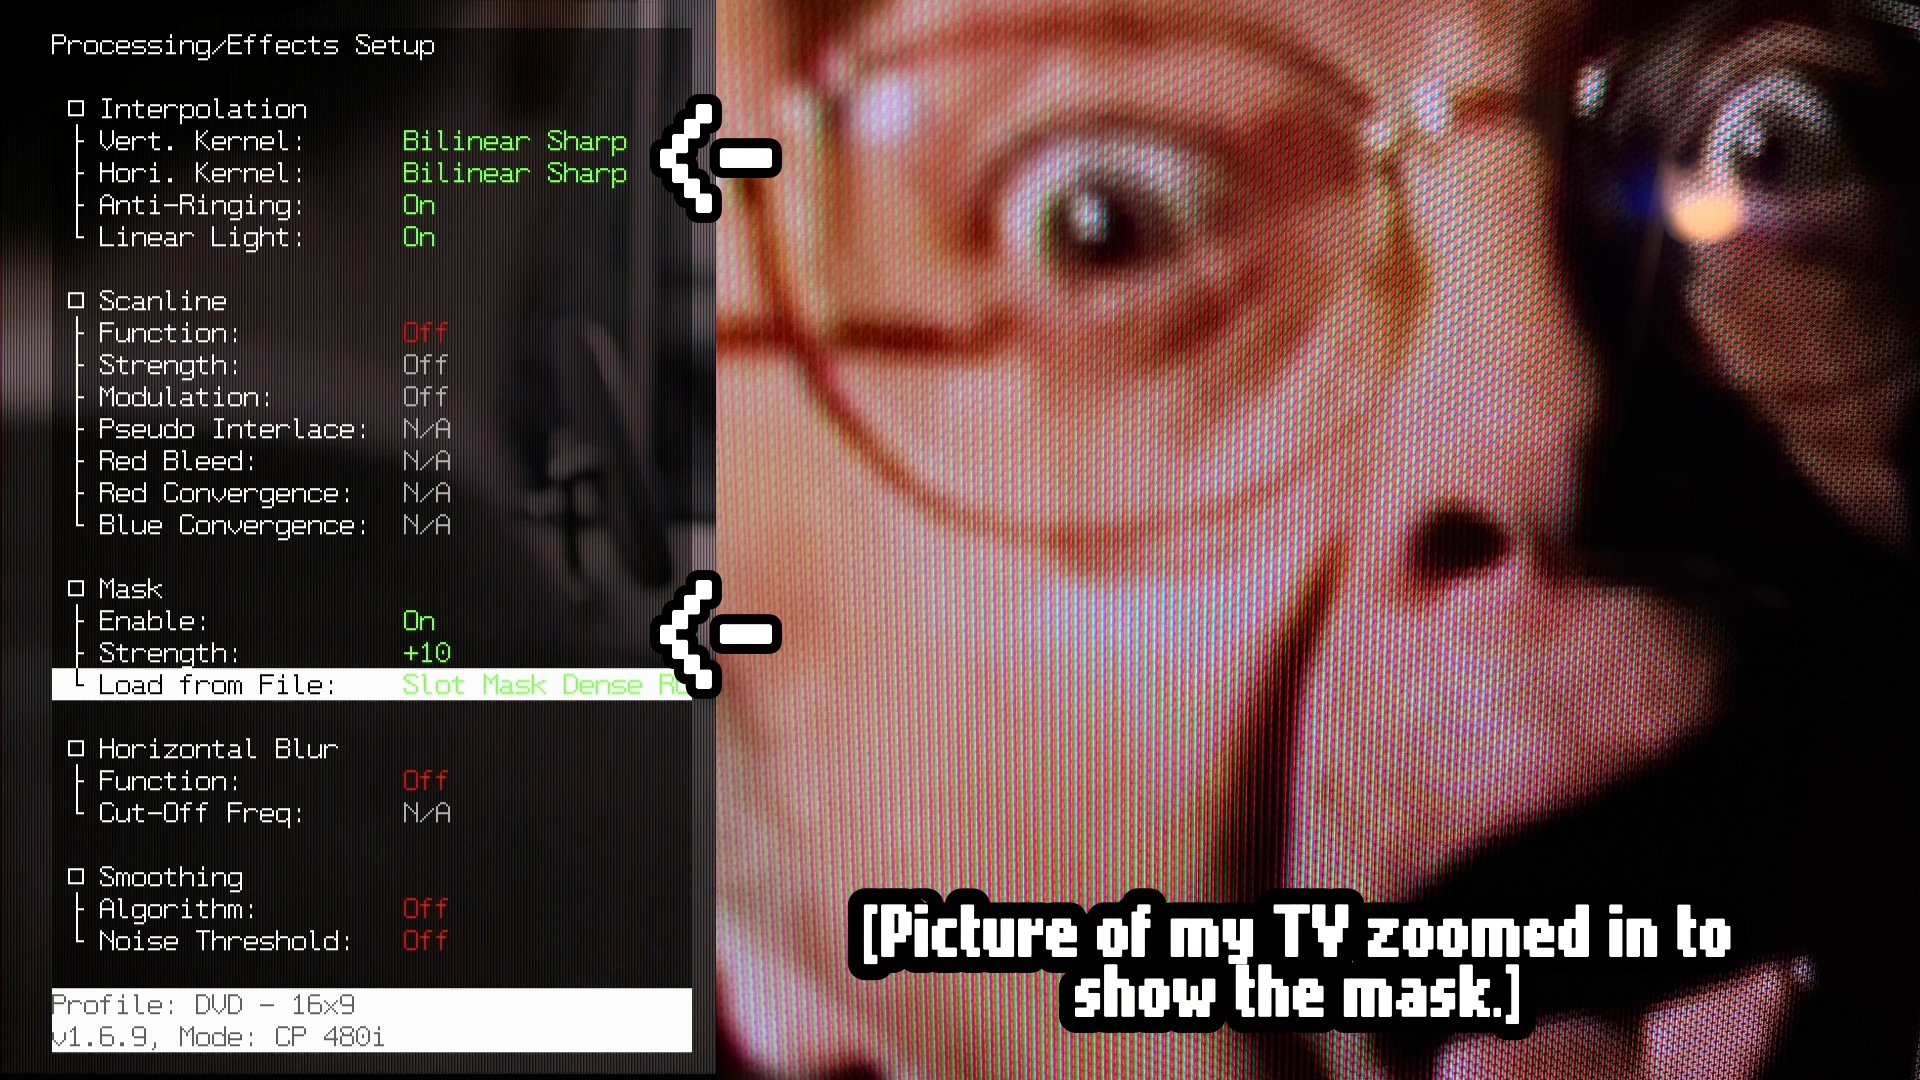
Adding a shadow mask filter will sharpen the image, similar to how a CRT does. These settings worked best for me and my 55in TV. Experiment with other masks and strengths to see what you like. You can also add scanlines, but 480i/480p signals didn’t have them and it darkens the image a lot. I’d stick with masks only.
Save Your Work!
Once you have a great picture dialed in, save it as a profile so you don’t have to do it again.
- Go to
ProfilesandSave Profilethen pickSave as New. It will save your work with a generic profile name.- A new experimental firmware update allows for naming profiles with the remote making this step even easier! No need to do the steps below.
- Take the SD card out of the RetroTINK and put it in your computer. You can rename the profile file to something more descriptive, like “DVD - 16:9.”
- You can copy that profile and rename it for the other aspect ratio, like “DVD - 4:3.”
- Put the SD card back into the RetroTINK. Load the new profile and change the
Aspect Correctionto4:3. - Then go to
ProfilesandSave Profile. This time you canSave Current.
Now you have profiles for both 16:9 and 4:3 videos. Assign them to a Shortcut Button and it’ll be as easy as hitting a number on the remote to load them!
RetroTINK 4K Pro 1080p/120fps Output
Dejudder works pretty well with 60Hz TVs, but the easiest way to eliminate it completely and have smooth 24fps and 60fps, is to set the HDMI Output mode to 1080p120. 24hz content get’s evenly multiplied by 5, and 60Hz multiplied by 2, so they fit the 120Hz signal. The Shadow Mask filters don’t look as good at this 1080p resolution, but there is another option below that you can try to have it all.
RetroTINK 4K Pro 4K/24fps Output - Custom Modeline
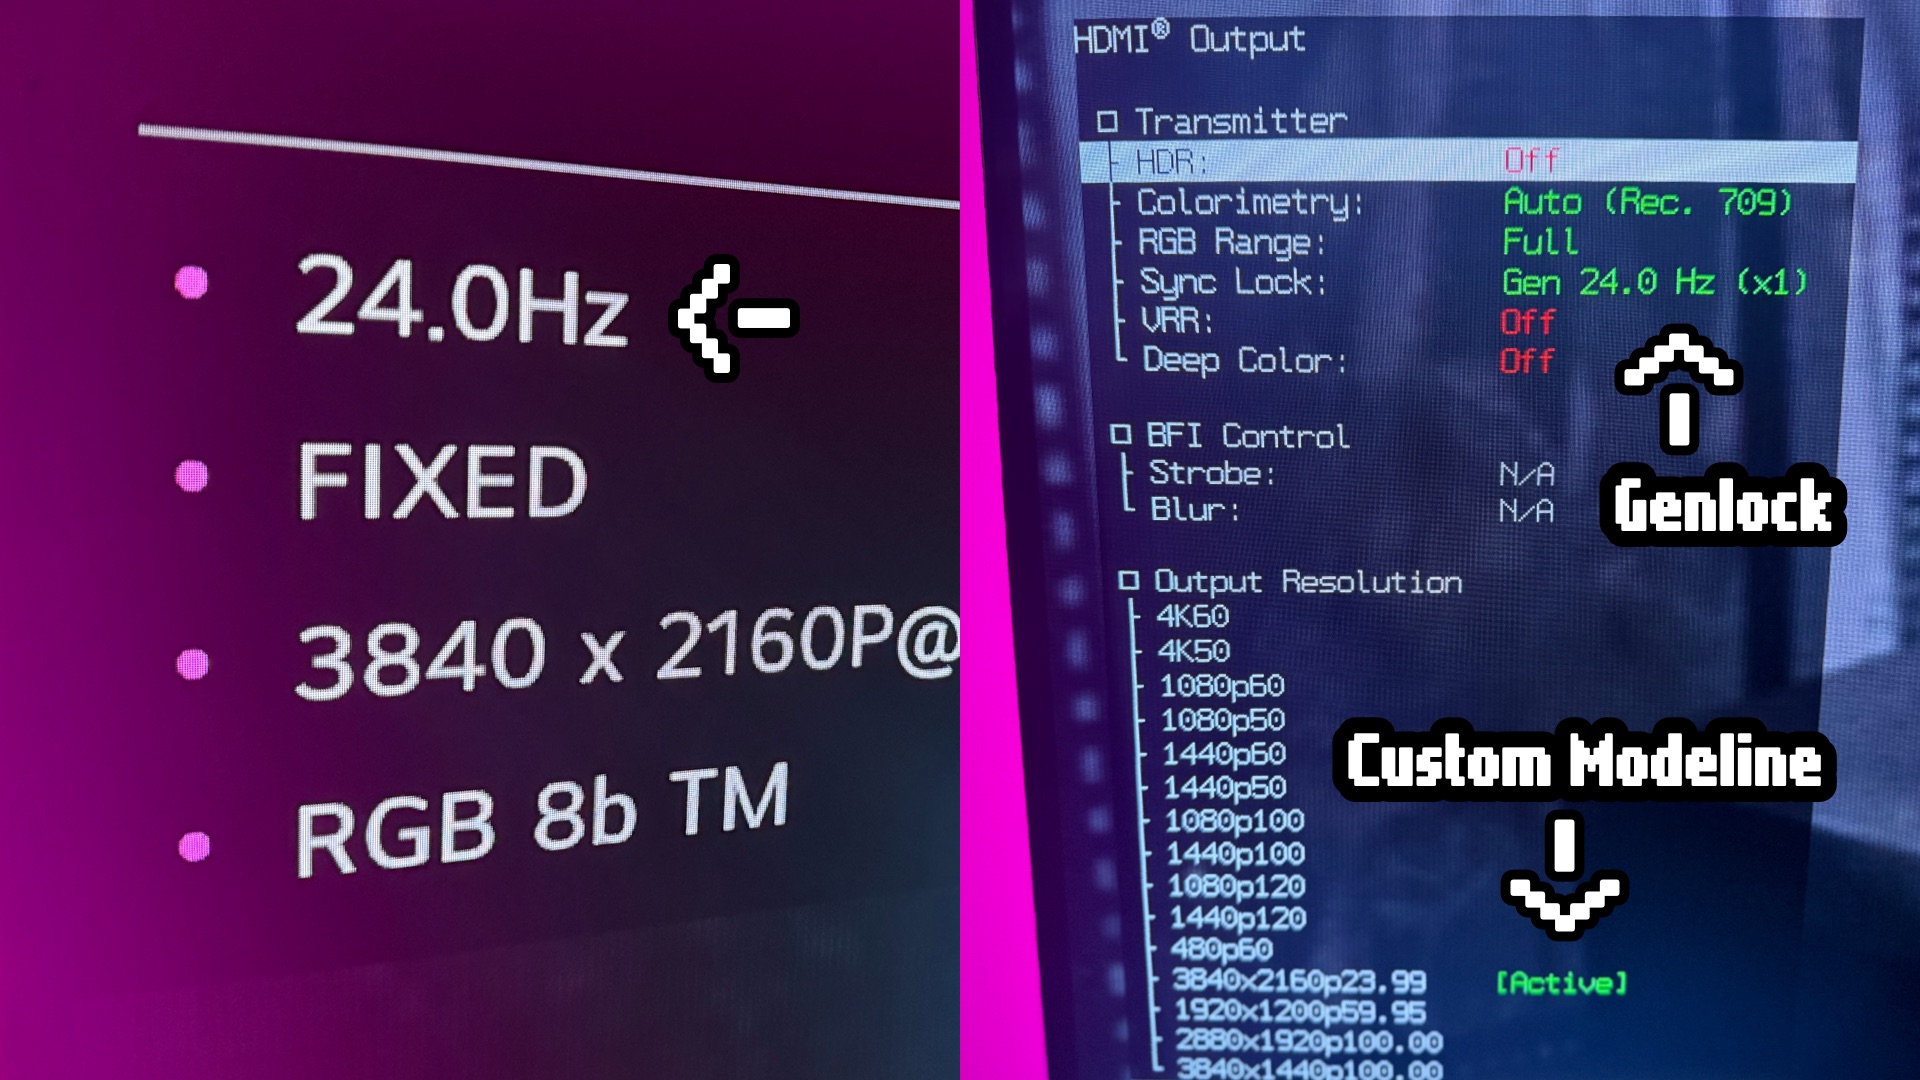
The RetroTINK’s built-in output modes don’t include a 4K/24Hz option by default, but the Pro supports it via a custom modeline. My LG C1 supports a 24Hz signal. If your TV does too, you can create a custom modeline using the RetroTINK Video Timings Calculator.
My custom modeline for 4k 24fps output that works on my LG C1.
3840, 216, 400, 1232, 0, 2160, 3, 5, 32, 1, 23.99, "3840x2160p23.99"To use it:
- Take the custom 4K/24Hz modeline above and save it as
custom1.txtin themodelinesfolder of of the RetroTINK 4k SD card. It’ll then appear in the HDMI Output menu towards the bottom of the list. Don’t enable this output yet. - Set
Inverse Telecineto3.2andDejudder 24 HztoOnin the Film Mode/IVTC section of Advanced Settings. - Set
Sync LocktoGen Lock. Dejudder 24 Hz requires this. It doesn’t work in Triple Buffer mode. - Now select this new custom mode from the HDMI Output menu. You should have 24fps video out at 4k. (On the LG C1, you can press the green button seven times in a row to get a menu and check.)
Then save this as a new profile for 24fps Film. 24fps content will only look good with this profile. If you watch some other content besides film, like special features, it may be in 60fps. When that happens, switch back to the first profile above and it should play fine.
For a deep dive on how to work with 24p content on the RetroTINK 4k, RetroRGB has you covered.
Start the conversation